Laptop keyboard problems! Causes range from liquid damage and sticky or broken keys to different installation variants and the work involved in replacement. The effort required to fix laptop keyboard damage (usually by replacing the keyboard) varies greatly depending on the design and installation variant of the laptop and the keyboard. By the way, the different variants are not brand-specific.
Due to their design, almost all major manufacturers use these four following installation variants for laptop keyboards in their various model series.
Table of Contents
Variant 1 - The laptop keyboard is inserted into the laptop housing from above. (Old design)
In Variant 1, the laptop keyboard is usually held in place with several plastic retaining tabs. If you want to remove the keyboard, these tabs must first be carefully unlocked. In some cases, the keyboard is also screwed down in this installation variant. In those instances, there is often a small plastic cover over the screws that needs to be removed.
Once the keyboard is detached from the top case, you only need to unlock the connector on the motherboard. Then the old, damaged laptop keyboard can be removed and the new keyboard can be connected, inserted, and locked or screwed into place. In the event of liquid damage, a visual inspection is performed to determine if the liquid has caused any further damage to the laptop. In this case, the laptop must be opened completely.
Variant 2 - The laptop keyboard is screwed into the top case from behind.
In Variant 2, the laptop’s top case must be opened and the keyboard removed from the inside. With this installation variant, replacing the laptop keyboard is much more complex than with Variant A, as the laptop must be completely disassembled. Depending on the laptop brand and model, different steps are required, but the time involved is usually similar.
The new keyboard is then attached to the top case from behind. There are individual openings for the keys in the top case itself, making this area of the top case look like a perforated plate.
The basis for this laptop keyboard design is usually a base plate with options for fastening the unit to the laptop’s top case. These are often small screw mounts for plastic screws. Experience shows that these screw mounts and plastic screws are usually not designed for multiple keyboard replacements. Unfortunately, the material and design often set strict limits on repeated keyboard changes.
Variant 3 - The laptop keyboard and laptop top case form a complete unit. (Current design)
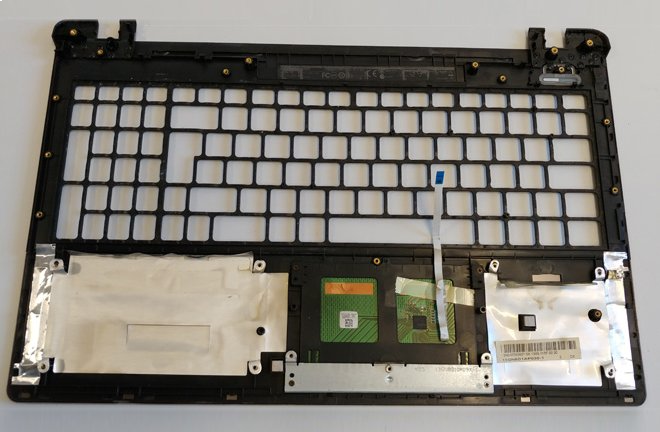
In Variant 3, the laptop keyboard is permanently glued to the top case, meaning this structural unit can only be replaced as a complete spare part. This complete unit tends to be slightly more expensive than keyboards that can be ordered individually, but actual prices vary greatly from manufacturer to manufacturer. In our experience, the spare part costs for such a complete keyboard unit are still quite low for ACER or ASUS.
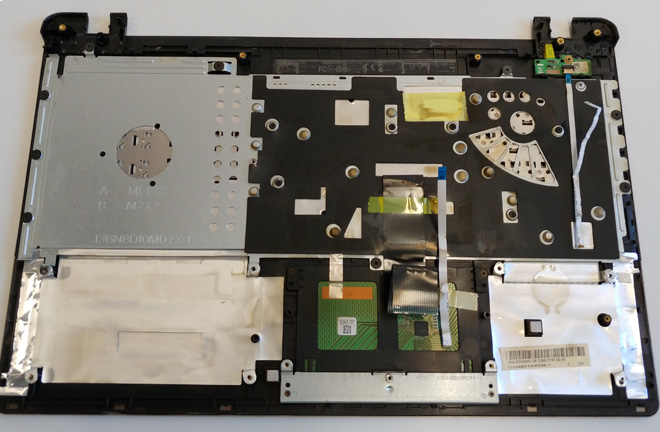
After disassembly, the cables for the touchpad, keyboard, and/or keyboard backlight must be detached or replaced in this type of laptop keyboard. Depending on the features of the spare part unit, other components or cables from the old top case keyboard unit may also need to be transferred. Regarding the spare parts situation, the new unit always includes the keyboard and keyboard cable. All other parts not included in the replacement keyboard unit must be transferred.
Additionally, there is a special sub-variant where the top case can be removed completely from the top after loosening the corresponding screws on the bottom of the device. The time required to replace a laptop keyboard in these variants is usually very manageable.
Variant 4 - All laptop components are screwed to the top case with the keyboard layer by layer.
This Variant 4 is the most complex for keyboard replacement. If you want to replace the laptop keyboard here, the laptop must be opened from the bottom (bottom case) and all components or units must be removed/disassembled one after the other until you reach the actual laptop keyboard. The effort involved varies greatly depending on the manufacturer and model. It always depends on how many small individual circuit boards and ribbon cables, etc., are installed in the laptop. For some laptop models, this can be very cumbersome and sometimes take over an hour until everything is removed and reinstalled.
Note!
We won’t go into even more specialized laptop keyboard variants here. Variants 1 and 4 are now the most common. Overall, the design of most laptops has become somewhat simpler in recent years. However, if you want to get to the keyboard, a lot of surrounding parts often have to be removed.